Setup & Configure FTP server using VsFtp on Ubuntu Server

  • Install VsFTPd server on ubuntu

Open the terminal and run the following command

sudo apt-get install vsftpd


  • Configuring Vsftpd server

The default configuration file is located at /etc/vsftpd.conf so you need to edit this file to configure your vsftpd server

sudo vi /etc/vsftpd.conf

Disable the ability for users to log in anonymously by changing the following option

anonymous_enable=NO

Next, we need to enable user logins that use the local authentication files, since we disabled anonymous access. Uncomment the following line

local_enable=YES

To enable users to make modifications to the filesystem, we will uncomment the following option

write_enable=YES

uncomment the chroot_local_user option to restrict users to their own home directories

chroot_local_user=YES

Save and close the file.


  • Creating FTP User

Because of the way vsftpd secures its chroot jails, the chroot must not be owned by the user and must not be writeable. Because of this, it is best to implement a user specifically for use with FTP.

Create the user using the following command

sudo adduser ftpuser1

Assign a password and feel free to press “ENTER” through the other prompts. Now, give root ownership of the ftpuser1’s home directory:

sudo chown root:root /home/ftpuser1

We need to create a separate directory within this home directory where files can be uploaded. Then, we need to give this directory over to our FTP user:

sudo mkdir /home/ftpuser1/files
sudo chown ftpuser1:ftpuser1 /home/ftpuser1/files


  • Restart the FTP server:

sudo service vsftpd restart

Now, we should be able to log in (insecurely) as the ftpuser1 and upload files to the files directory.

Best free website monitoring services

We all have our own website nowadays. But most of us don’t know until someone else to tell us that our site is down.

There are many free website monitoring services available. Following are the few of them that are best free website monitoring services:

Features UptimeRobot
Pingdom
GotSiteMonitor
Sites can Monitors 50 1 5
Monitoring Interval 5 min 1 min 5 min
Email Alerts Unlimited Unlimited Unlimited
Free SMS Alerts Not available 20 20
Monitoring Locations N/A N/A Multiple

uptimerobotYou can monitor up to 50 websites, most importantly it checks your website every 5 minutes and its totally Free.  The user interface is very easy, neat and clean.

pingdomOne of the most reputed one, but the free account will allows you to monitor only one website.  But I like this system because it can check your website every 1 minute. The system has many features and very modern user interface.   If you have only one website to monitor I would suggest you to get an account.

gotsitemonitorThe free account will allow to monitor up to monitoring interval is 5 minutes.  This system has a unique feature that you can set to monitor yoru website from different geographic monitoring locations, for example if your website visitors are from Europe, it is better to monitor from Europe based servers.

How to Install Kloxo-MR on CentOS 6.4 VPS machine

Kloxo-MR is a decent free to use control panel to run your web hosting server. Below are the easy steps to install Kloxo-MR on a CentOS 6.4 server
Kloxo-MR
Have your CentOS 6.4 VPS machine booted and connect to it via your Console (I use Putty ssh) as a root user.

At your # prompt, type and enter to go to the root folder

cd /

Now, you will update centOS to latest version:

yum update -y

Now, install packages like package-cleanup, etc

yum install yum-utils yum-priorities vim-minimal subversion curl zip unzip -y

and

yum install telnet wget -y

and

setenforce 0

and

echo ‘SELINUX=disabled’ > /etc/selinux/config

and go back to root folder

cd /

Now, lets install Kloxo-MR, and I am always going for the tested Final Release:

Change to repo dir

cd /etc/yum.repos.d/

Now, get the repo file

wget https://github.com/mustafaramadhan/kloxo/raw/release/kloxo-mr.repo –no-check-certificate

Now, go back to root folder

cd /

Now, install

yum install kloxomr -y

Now, run setup.sh before reboot

sh /usr/local/lxlabs/kloxo/install/setup.sh

Kloxo-MR-
and, finally reboot

reboot

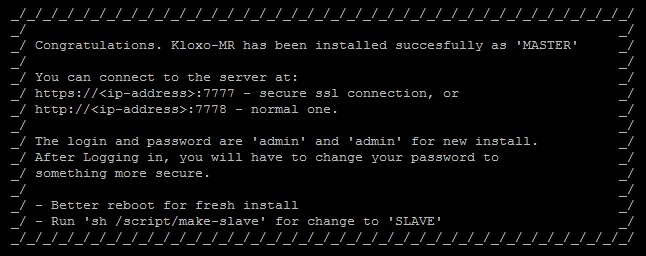
After the machine is rebooted, you should be able to access the Kloxo-MR via your web browser using the port 7778 or 7777 as follows:

http://Server-or-serverIP:7778

https://Server-or-serverIP:7777

Default user name and password is:

admin

More information about Kloxo-MR http://forum.mratwork.com/

Install Ubuntu Desktop environment for old PC

Ubuntu comes by default with its defult Desktop GUI enviremnet that will can be very heavy for an old PC, therefore I wold install only Ubuntu server and manually install a light Desktop environment

Type the following command at the Terminal Command Box:

sudo apt-get update

to install XFCE :

sudo apt-get install xubuntu-desktop

XFCE

alternatively, you can also try LXDE instead of XFCE by the following command:

sudo apt-get install lubuntu-desktop

lxde

After the above installation you need to reboot your PC


Connect to Ubuntu from a Windows Remote Desktop (RDP)

In your Ubuntu machine (mine is 12.04 version), type the following command at the Terminal Command Box to install the xrdp

sudo apt-get install xrdp

Now in your Windows machine, go to Start –> All Programs –> Accessories –> Remote Desktop Connection and type the IP address or HostName of the Ubuntu machine then click‘Connect’

When prompted, enter your Ubuntu username and password and click ‘OK’

xrdp

Now you should see your Ubuntu desktop

Free More Memory in Ubuntu

Following procedure will help you to free more memory in ubuntu machines :

Type the following command at your terminal command prompt :

  1. Check the current memory

    free -m

  2. Flush file system buffers for safety

    sync

  3. Become root (simply sudo-ing the final command won’t work because of the redirection)

    sudo bash

  4. Free cached memory

    echo 1 > /proc/sys/vm/drop_caches

  5. Now finally check the memeory status after freeing

    free -m